
1.

1


To begin creating this graphic, i made the pot plants. in order to do this i drew two ellipses using the Ellipse Tool (L): one on the bottom and a second one on the top of the flower pot shape. I then used the Unite button on the Pathfinder panel (Window > Pathfinder) to make the one shape.


To make the flower pot three dimensional, i coped the flower pot shape infront and changed the colour to a lighter grey. I then placed it so it overlapped the pot. While selecting both the copy of the pot shape and the overlapped ellipse i pressed the Intersect button on the Pathfinder Panel.
I then placed it so it overlapped the pot. While selecting both the copy of the pot shape and the overlapped ellipse i pressed the Intersect button on the Pathfinder Panel.I then repeated this with two more shades of grey, gradually going lighter.
2


Creating these succulents, I made the first cactus plant in Adobe Illustrator.
Firstly i went in with the ellipse tool to make the base. Next I used the direct selection tool to move the left and right anchor points to make a larger and more squared off top.
To obtain depth in the flat art i simply added two more different shade of green ellipses.

I then created another ellipse under the top one and stretched it down, changing the fill colour to white. While keeping the top Ellipse selected I went to Object > Path > Offset Path, Enter -4 and changed the colour to dark grey.

To make the flowers, i took the base of the cactus, changed the fill colour, and flattened it down. I made 3 copies of this and positioned them in a cluster. I then grouped the three and copied them onto a new layer. The fill colour was them changed and the shape was made bigger and sent to the back to create a 3D effect.
3


Next i made the Haworthia Succulent by copying the same pot plant that i had previously made using the bulge and warp option round it off.

Here i used the warp options tool to create a slight bend in the leafs in order for them to bend in alternate directions.
4


For this plant i used ellipse tool to create each leaf. I used the direct selection tool to move the points which created the pointed tip. Next i duplicated the layer and changed the colour for a lighter effect.

Here i used the clipping mask tool to circle what i wanted to keep and eliminated anything below the pot that was over hanging.
5

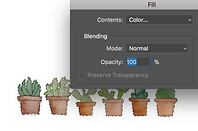
Here i added a purple background for some colour. i then used the ellipse tool, set it to the colour grey and turned the transparency down. i then positioned it under the pots to create a shadow effect.
6

I used the colour white for the text as i believe that it was the only appropriate one to use as it matches with the pots.
2.

1

To begin designing this flat art succulent pot, i started in illustrator with the rectangle tool and created to different sized rectangles. I then used the direct selection tool and in transform i used the corner options to add a slight curve.
4

I duplicated the leafs 3 times and positioned them above the pot.

2
3

Here i created two ellipses that crossed over each other. I then selected them and used the shape builder tool to slice through the sections i wanted to remove.
In order for the shape to have colour i added a fill to the whole leaf. Next i decided to add a darker shadow. For this i created a rectangle down the middle and once again selected both the shapes and used the shape builder tool to slice through and remove the excess.
5


Lastly, i used the font website called DaFont to chose a organic looking font that wasn't too structured for the text. I chose the MyStyle option as i felt that it was the correct thickness and style that i was aiming for.
3.

1

2
3

For this design i decided to create an extremely simple and basic design. I started off with a roughly water colour painted image.
I then used the magic wand tool to remove the white background leaving just the coloured pots as this is easier to combine the images without having excess white around the edges.
I then began copying and pasting the image multiple times then rotating and joining each one together to create a border.
4

The last step was to add a font. i decided to keep this one simple although i wasn't too happy with how it turned out as it is quite boring.
4.

1

I began creating this logo by using the pen tool, with a thick stroke, to draw a rough and choppy outline of a succulent.
3

To keep within a monochromatic colour scheme i created a blacked out ellipse and changed the outline of the illustration to white. The succulent was then placed in the centre as the main background graphic.
2

Once i completed the entire succulent i then changed the stroke to be thinner and intricate which fit better with the style i was going for.
4

I felt as though the title had to be bold and stand out against the background, therefore i went with a thick bold white font and placed it over the illustration. I ensured that the word 'succulent' was directly over the succulent in the background for context.
5.

1

2

3

For this logo i aimed for it to be basic yet 'cute' to attract a female audience. i began with an image of succulents in a cluster which i placed in the bottom half of the page.
Next i duplicated, rotated and flipped the image and placed it in the top half of the page.
In a font that was appropriate within the 'girly' theme i wrote the first and last words in blue capital letters.
4

I placed the word succulent in a different colour and in lower case to emphasise each section.
6.

1

2

3

Firstly in Adobe Illustrator i used the rectangle tool to create the basic shape of a house.
I continued on using the rectangle tool to create a more basic yet detailed door with steps.
I thought I would incorporate my previous potted succulent graphic that i made, to really tie in with the theme of a 'succulent house'.
4

To finalise this i added the title. The placement of the title was hard and I am not happy with the positioning

Whilst developing different logos for my Corporate Identity, I continuously referred back to this colour psychology chart as i based my designs on the moods i wanted my customers to feel when they viewed my designs.
- seeing as i am designing a Plant shop green was a major factor in the design process. The colour lime green is surrounded by growth, fertility and nature.
- Although i am designing a logo for a nature theme, black always stood out to me as it promotes elegance.